How to Customize Email Templates in Magento 2

In this article. we will explain How to customize email templates in Magento 2. Let’s find out how you can do it.
Magento 2 provides many default email templates like new orders, invoices, newsletter subscriptions, etc. If you want to customize the default templates, you should create custom templates and configure them instead of the default templates.
There are four Steps to Customizing an Email Template in Magento 2
- Step 1: Load the Default Template
- Step 2: Fill out the Template Information
- Step 3: Assign the new Email Template
- Step 4: Customize the Email Logo
Now, we will start to customize email templates step-by-step in Magento 2
Step 1: Load the Default Template
- Log in to Magento 2 admin panel and go to Marketing > Communications > Email Templates.

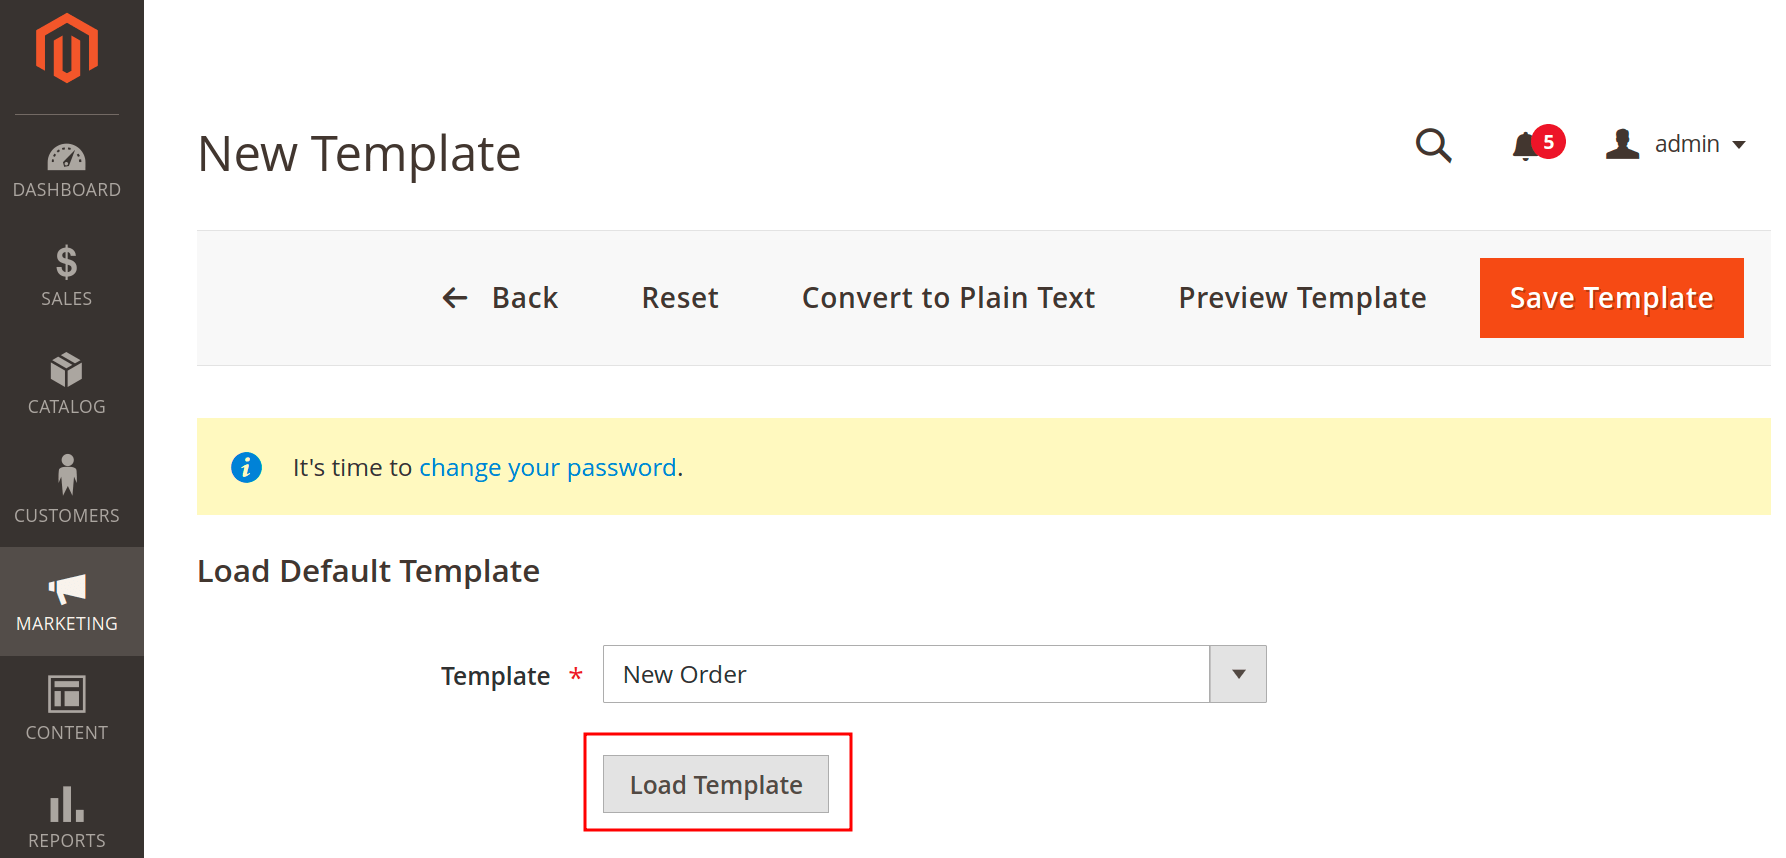
- Click on Add New Template button from the top right.
- Now you are adding a new template, select an email template as per your requirement of customization in the Template field and click on the Load Template button.

Step 2: Fill out the Template Information
- Now, set the custom name of the template in the Template Name field. And Change the Template Subject and Template Content as per your requirement.

- If you want to declare any CSS Put the styles in the Template Styles box.
- After making changes, click on the Preview Template to see how the changes will appear in reality.
- After you’ve finished the configurations, don’t forget to click the Save Template button from the top right.
Step 3: Assign the new Email Template
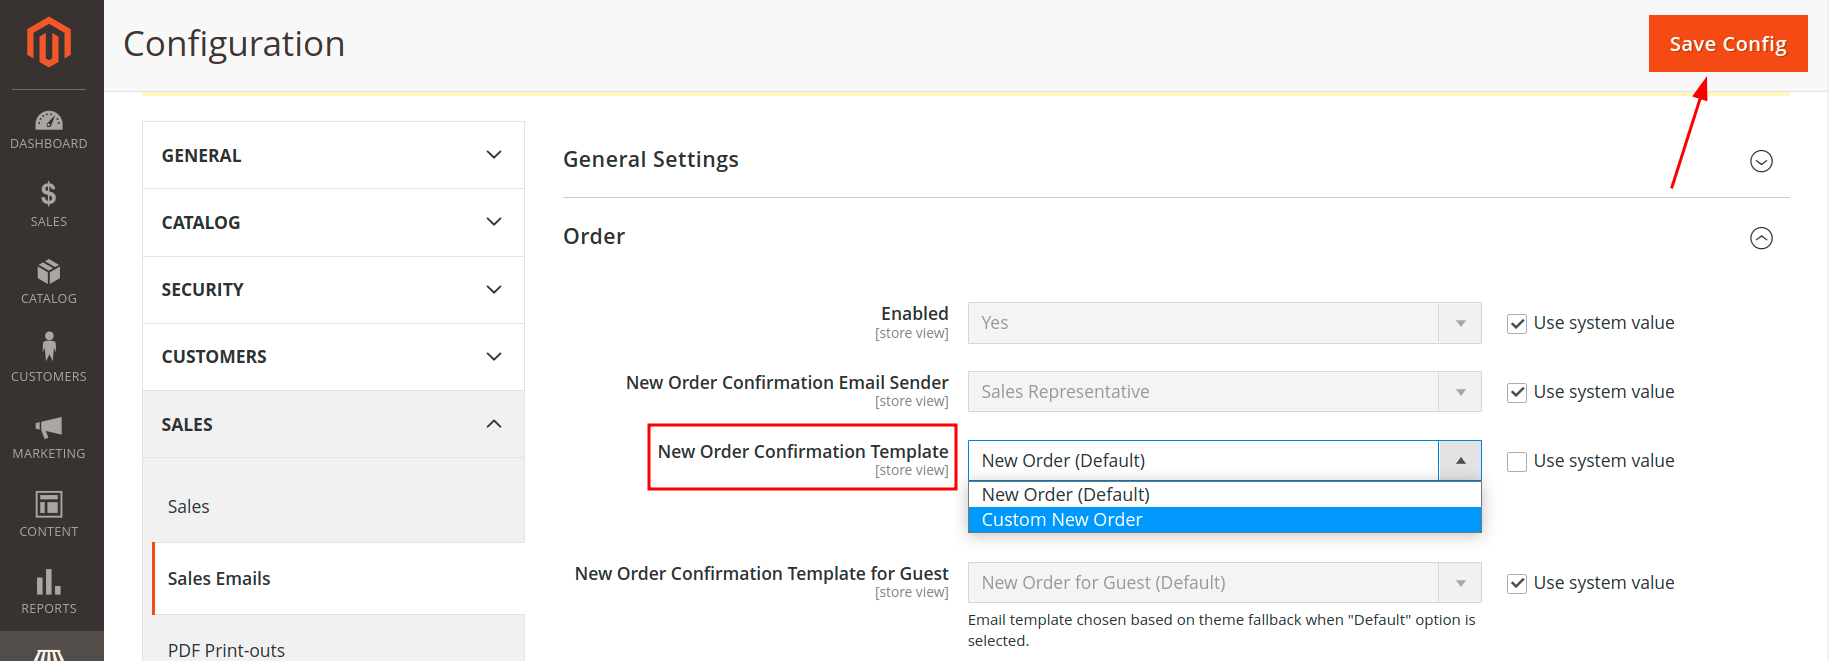
- Now you have created a new template you need to assign it to the store configurations. as we have created a New Order Template in this guide so we go to the Stores > Setting > Configuration > Sales > Sales Emails
- Then you need to find a template select box in the New Order Confirmation Template field remove the checkmark Use system value, and choose your email template from the list.

- After you’ve completed all of the configurations, click the Save Config button and flush the Magento caches.
Step 4: Customize the Email Logo
- Finally, after you’ve created the email template and assigned it to the store configurations, you’ll need to customize the email logo.
- Now go to Content > Design > Configuration Select the theme for which you want to customize the email logo.
- Then, go to the Transactional Emails section tab and fill out the following required fields.
- Upload your logo into the Logo Image field and fill another field like Logo image Alt, Logo width, Logo Height, etc.

- Now click on the save configuration button from the top right.
That’s it!
I hope this technical blog will help you to find what you were looking for.
If you have any further questions about Magento 2 theme development or if need any help from our Magento 2 expert, contact us now for a free consultation.
Bookmark it for your future reference. Do comment below if you have any other questions.
P.S. Do share this note with your team.
